Below is a step-by-step guide on how to set up the integration of your transaction data with Position Green if you are using Visma Business NXT and Visma Expense as your system providers.
Step 1: Create a New Integration in Visma Developer Portal
- Log in to your Visma account and navigate to the Visma API Store / Developer Portal:
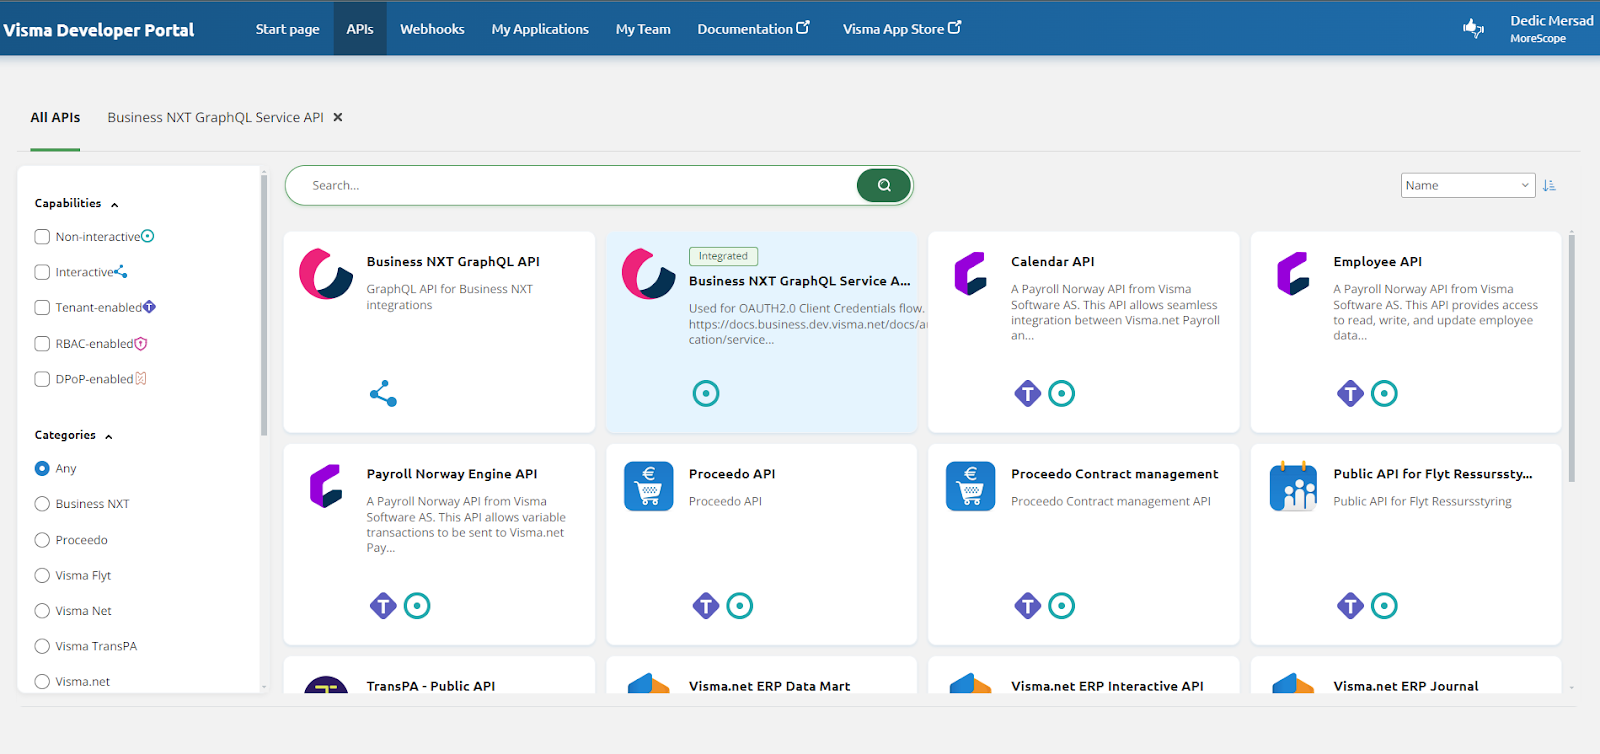
https://oauth.developers.visma.com/service-registry/apistore/list - In the search bar, search for “Business NXT”.
- On the API details page for Business NXT, click “New Integration”.
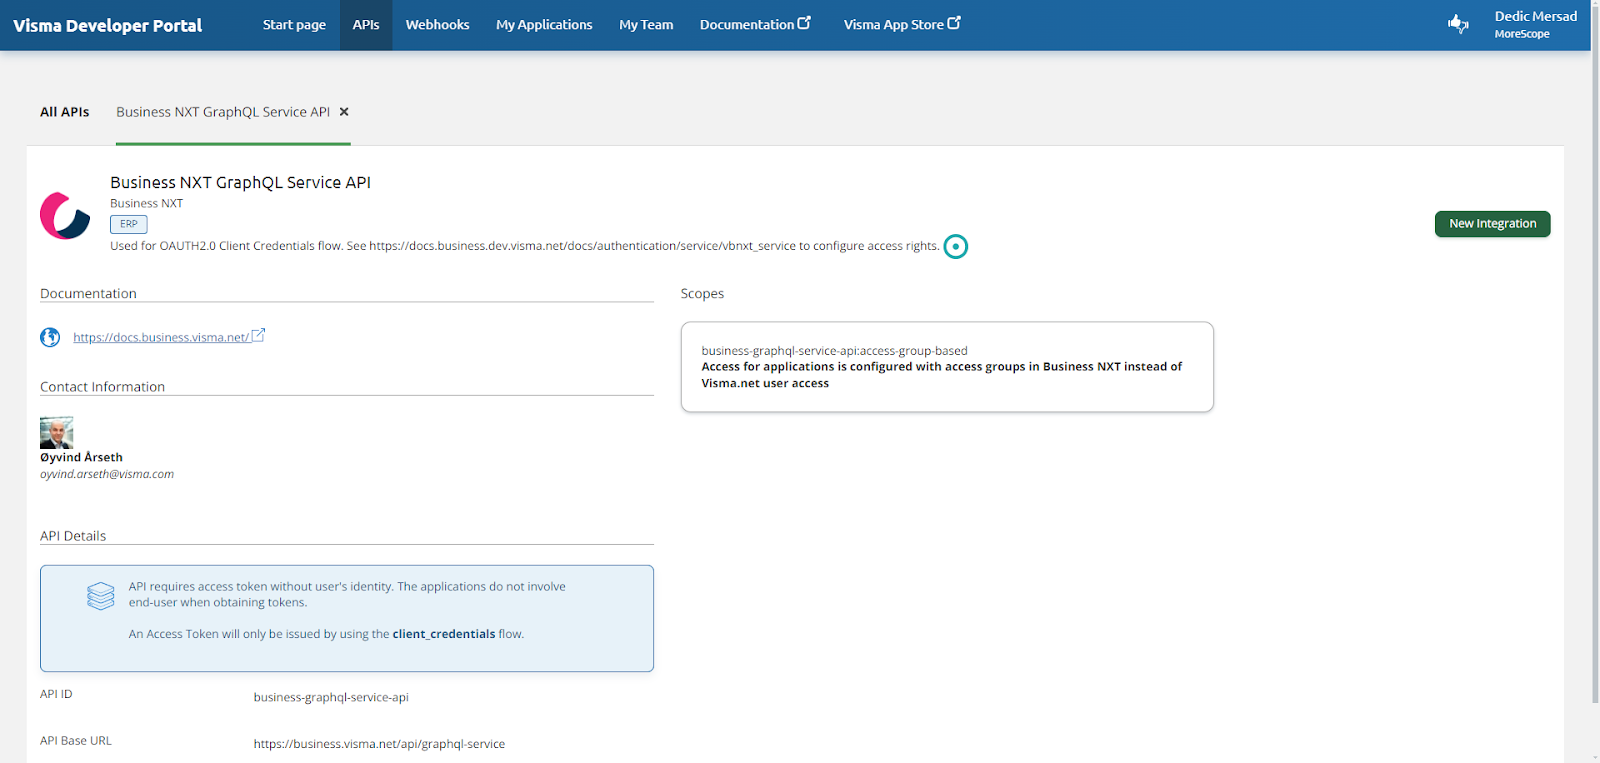
- Select "Machine-to-Machine" as the integration type.
- Select the scope:
business-graphql-service-api:access-group-based - Set a name for the integration (e.g.,
PositionGreen_YourCompanyName).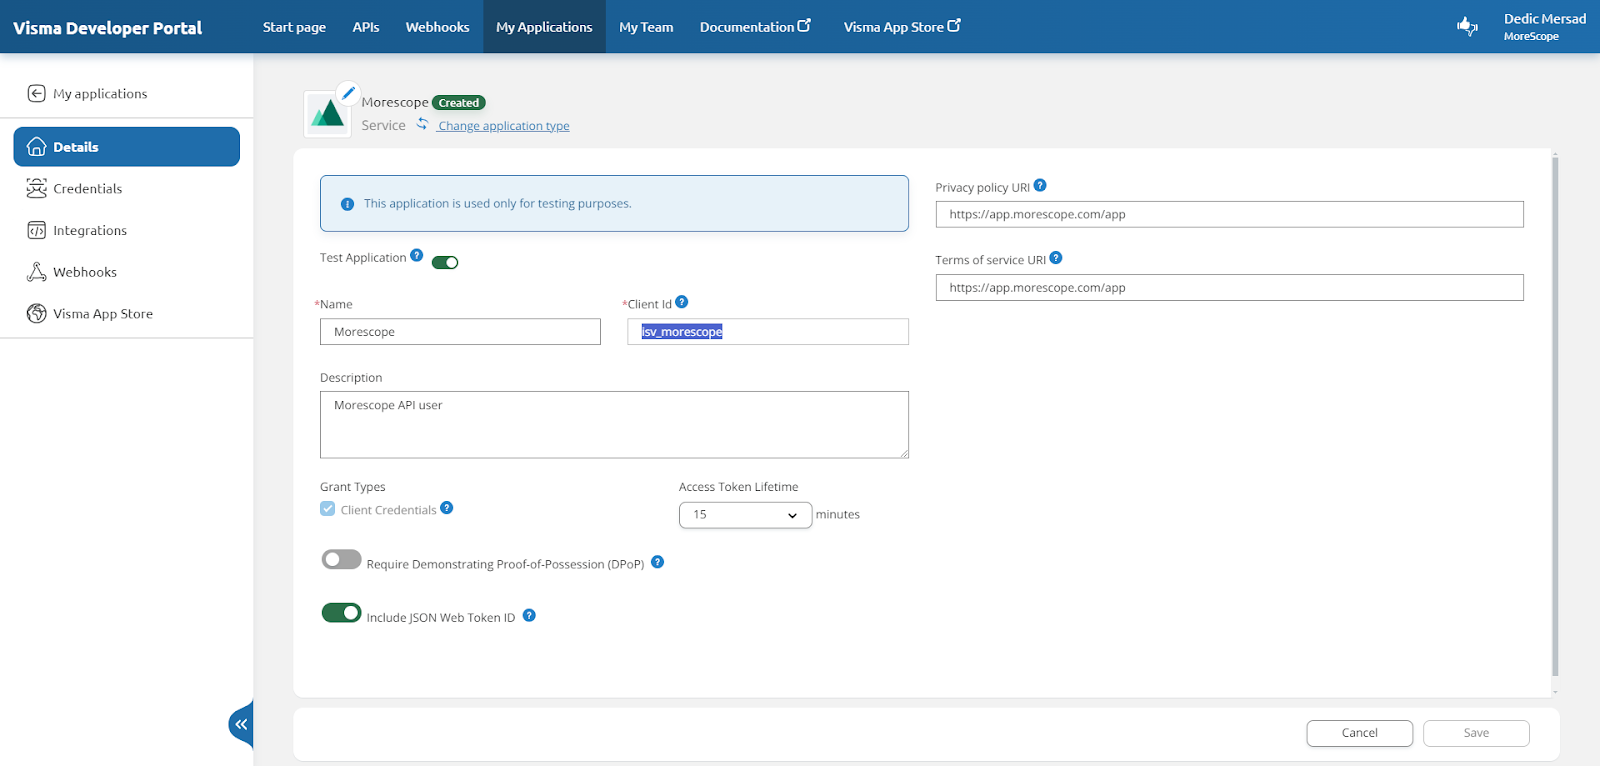
- Copy the generated Client ID field and store it for later.
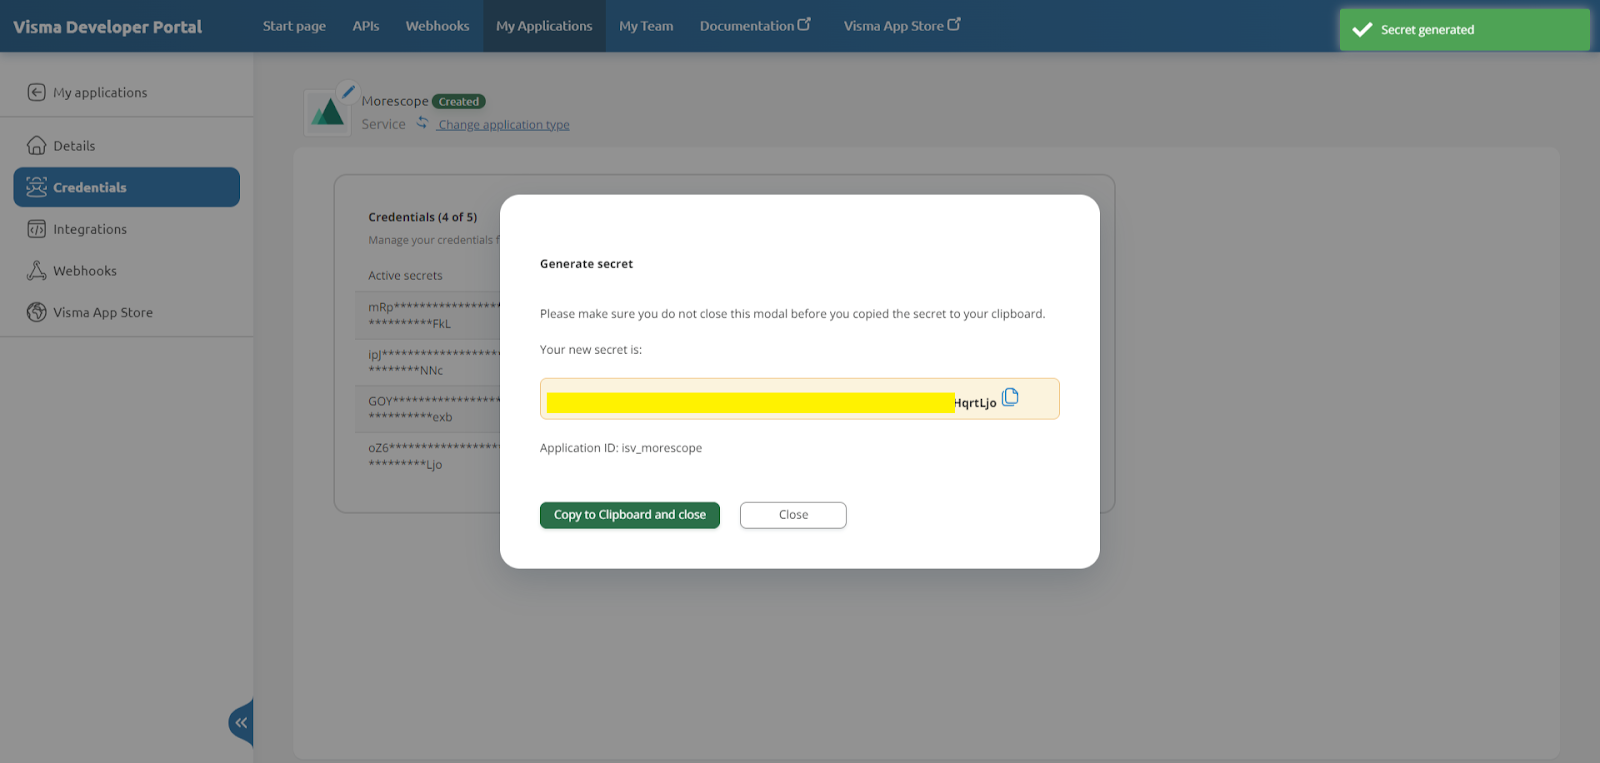
- Navigate to the “Credentials” tab and click “Generate secret”.
- Copy and securely store the generated Client Secret.
Step 2: Retrieve Your Company ID
Obtain your Company ID from your Visma Business NXT companies tab or system administrator. You will need this along with your Client ID and Client Secret to authenticate the integration.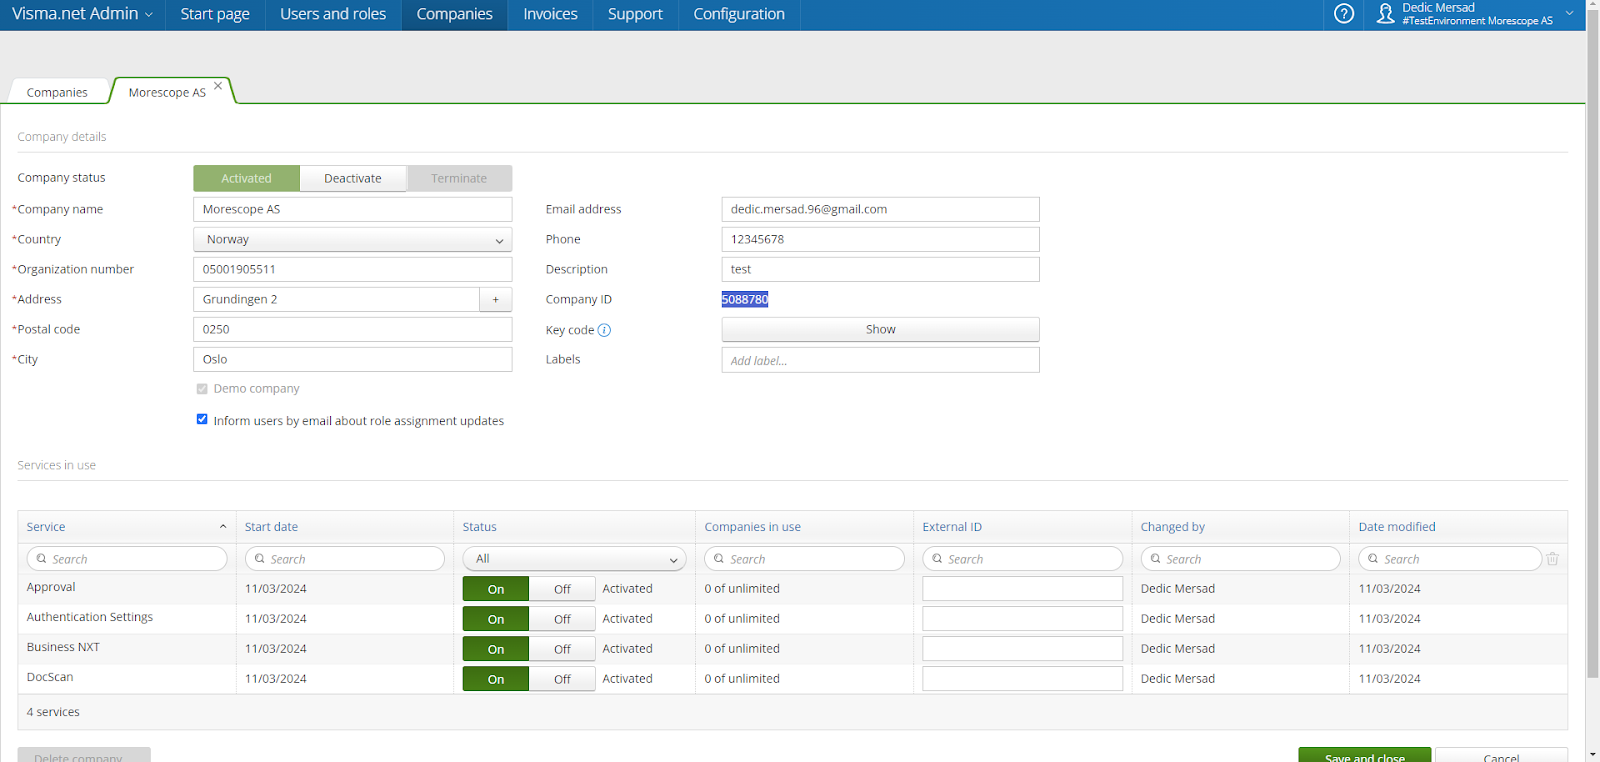
Step 3: Setup Connection Inside Position Green Application
- Navigate to “Data” in the left side menu.
- Go to the "Integrations" tab.
- Select Visma Business NXT / Visma Expense and click "Connect".
- Input the Client ID, Client Secret (from Step 1), and Company ID (from Step 2).
- Click “Authenticate and activate integration”.
- A verification check will run. You will see a popup and card status reading “Authenticating credentials”.
- When authentication completes (usually takes about 30 seconds), the card status will change to "Finish up".
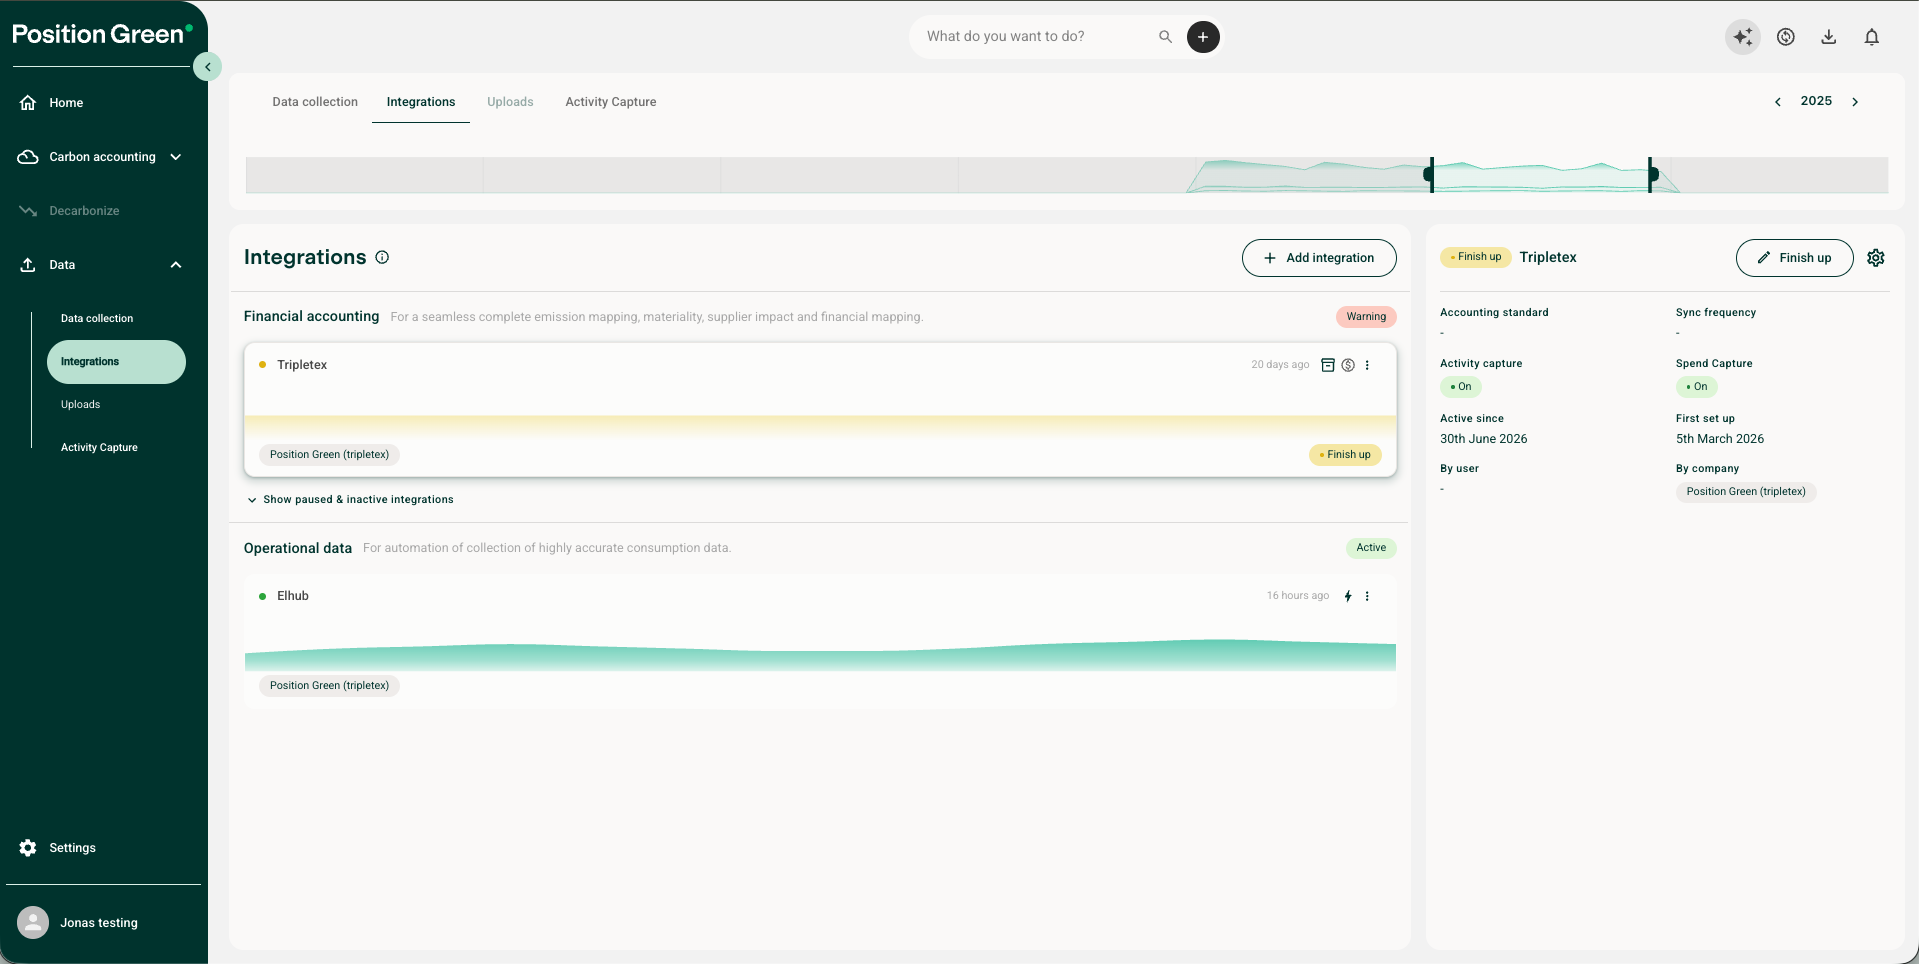
- Click "Finish up" and review the integration setup
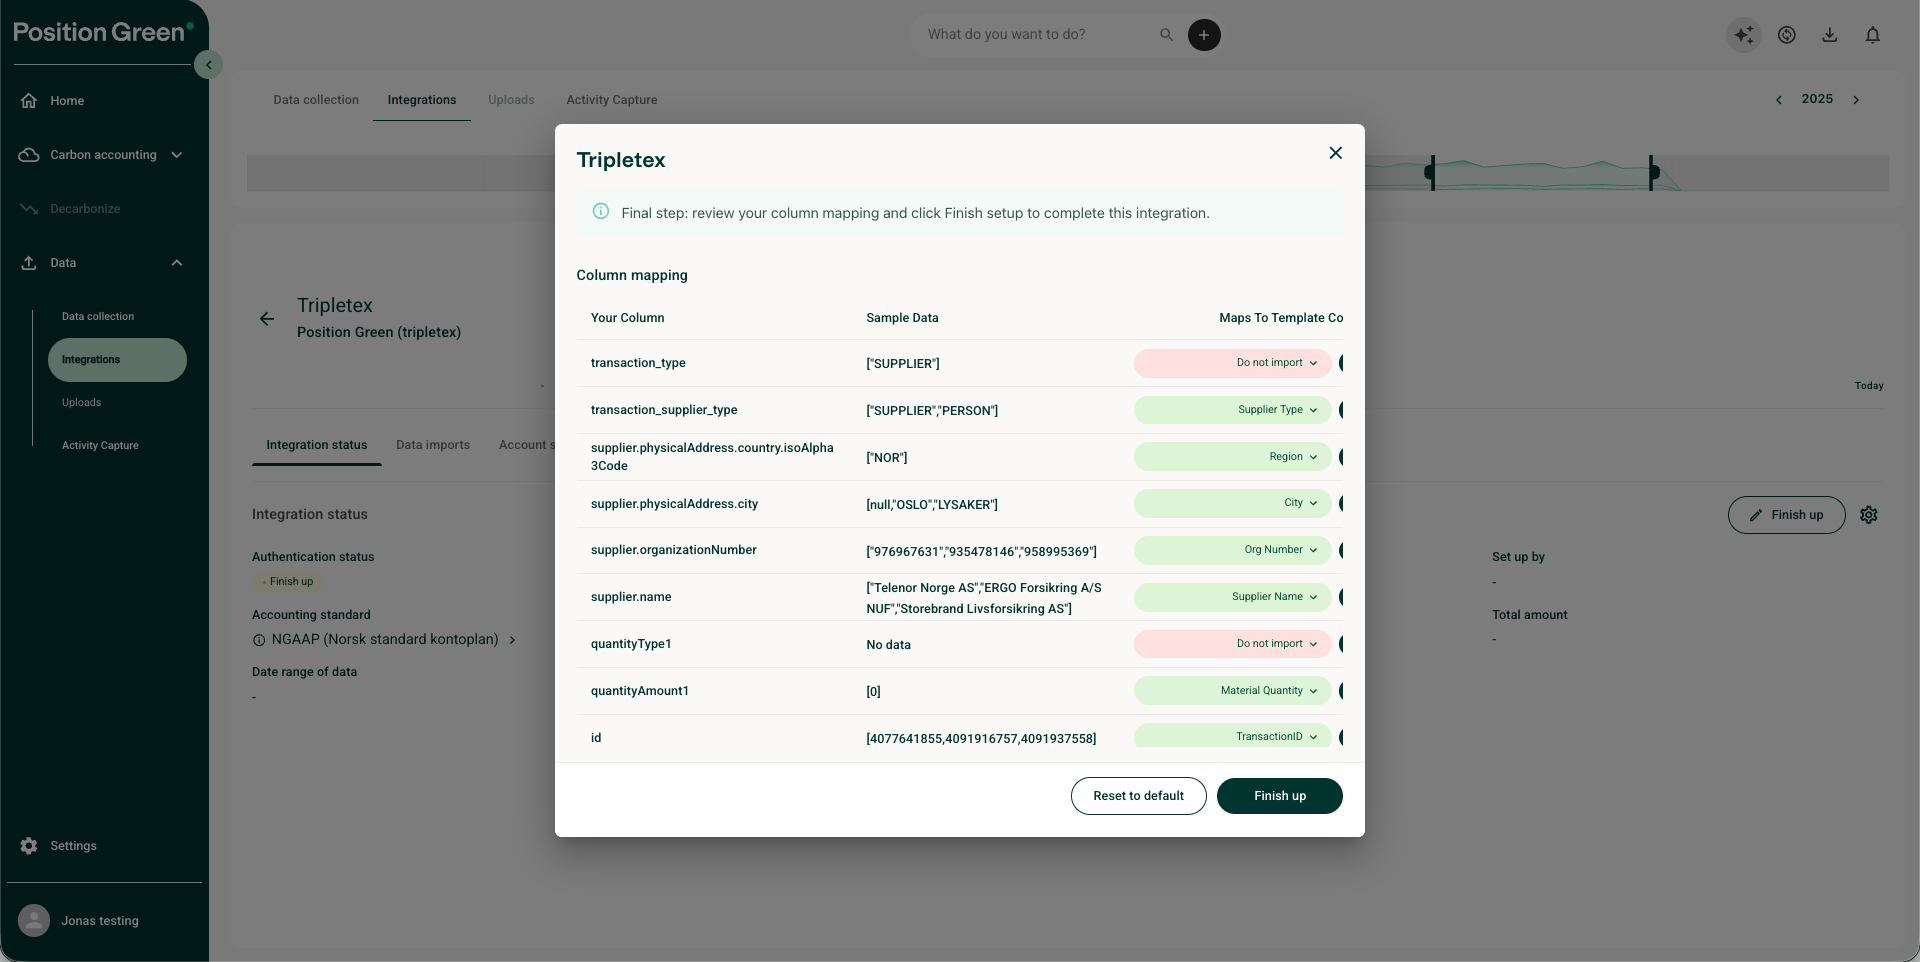
- You should now see that the integration is "Active"
Note that there are a preselected set of financial General Ledger (GL) accounts for each integration depending on your country and accounting standard. You can see and change that under "Account settings" under the integration setup. More information about account settings here.
Step 3: Fetching Data to Position Green
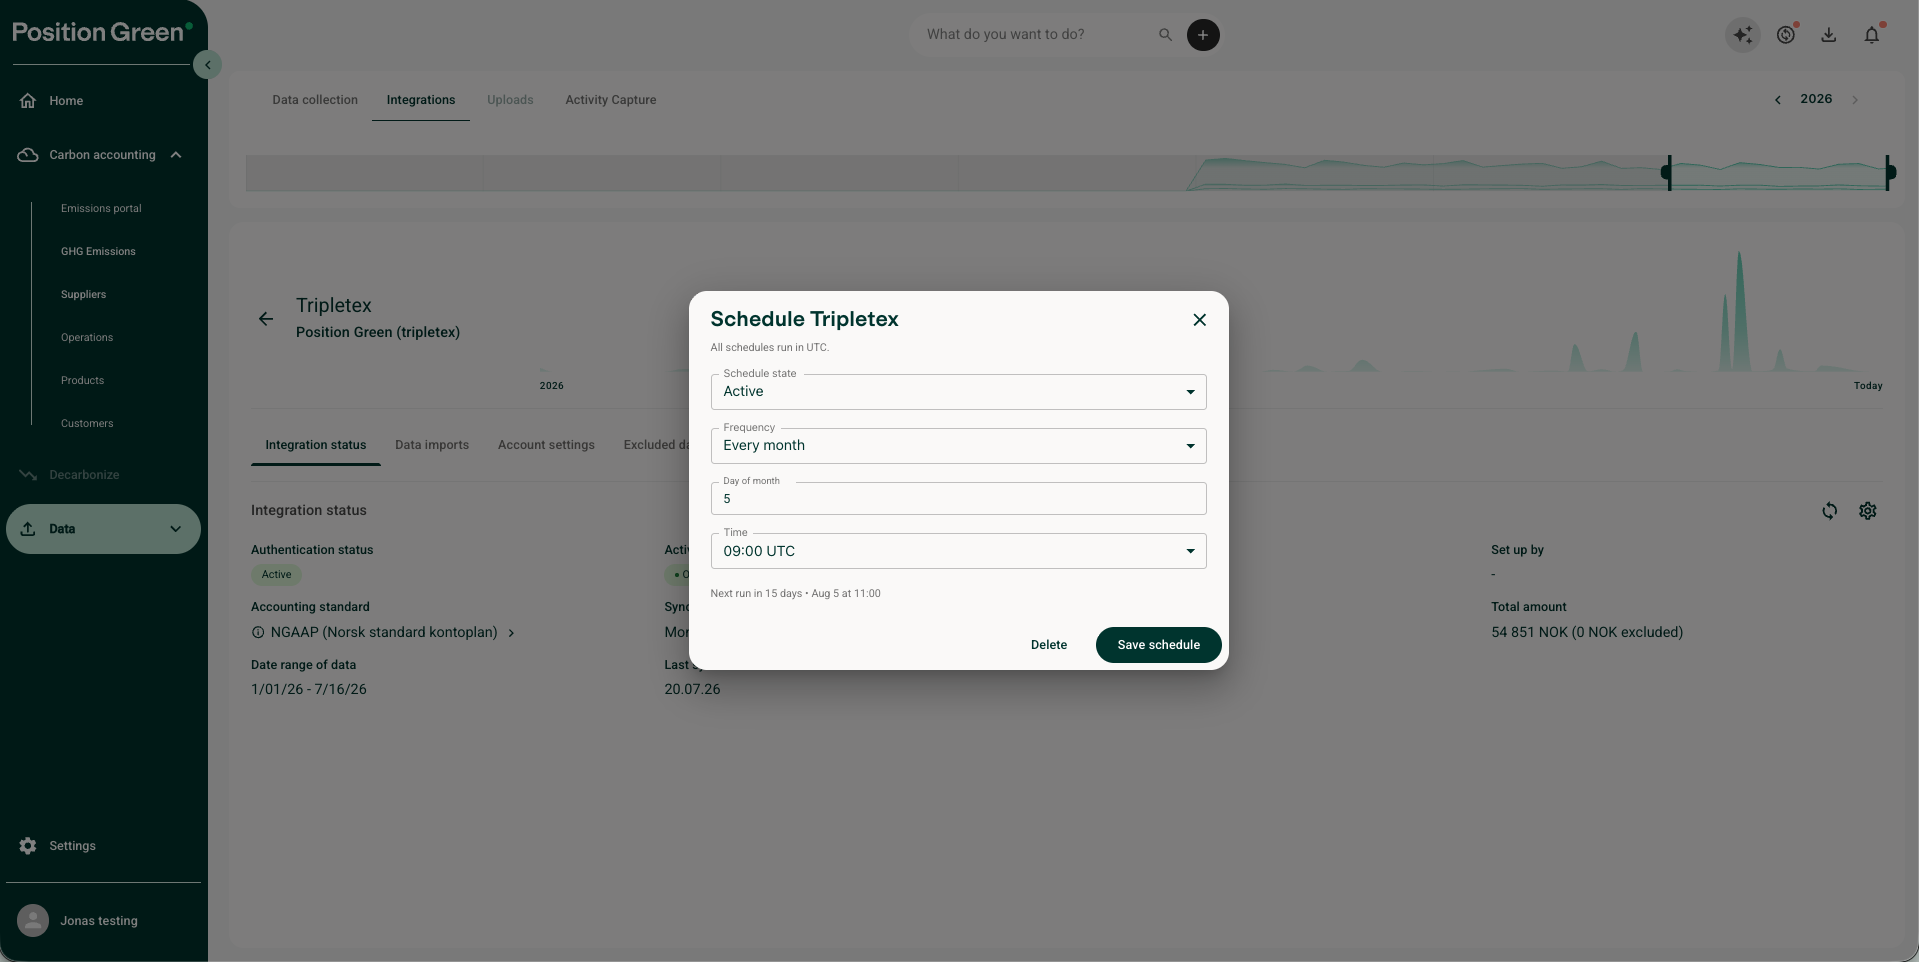
- The first time you set up the integration, you can trigger a historical upload for a custom period, e.g. for the whole last year or for only last month by clicking the "Sync now" button or the sync icon
- Note that you can also set a scheduled integration, e.g. making sure we get data the 5th of every month, under the "Sync frequency" option.
- Congratulations! You are integrated.
Contact Position Green Support
If you run into any issues, contact your Position Green onboarding representative for guidance or troubleshooting support.
Was this article helpful?
That’s Great!
Thank you for your feedback
Sorry! We couldn't be helpful
Thank you for your feedback
Feedback sent
We appreciate your effort and will try to fix the article